Thursday, May 27, 2010
Throwback Thursday: Beautiful You
I've always loved the awesome color combo in Beautiful You. To me, it's the perfect girly, sweet kit. Check out some of the fabulous LOs I found while browsing the gallery at ScrapMatters.
This one by ktkadoo is just lovely:
Here's one from kelseyll that's so sweet and adorable:
This gorgeous page from kellig is the perfect mother-daughter LO!
I'm in love with all the feminine ribbons and tiny flowers on this LO by shanscraps:
This awesome page by ColeAnne proves that even the girliest of kits can be used to make boy pages too!
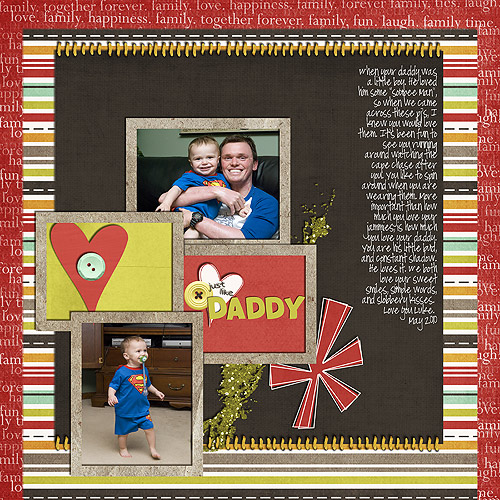
And finally, here's one from me (also using Paper Pieces Template Set by Plum Dumpling Designs).
I hope these LOs have inspired you to go check out Beautiful You. Remember that all these fantastic pages are linked to each scrapper's gallery, so please try to stop by and leave them some love. Happy Scrapping, everyone!
Wednesday, May 26, 2010
Hello, everyone! Jan (QuiltyMom) here to welcome you to another "A Bit of Inspiration" Wendesday. Sometimes I find that it's just downright hard to get started on yet another layout, and no matter what, I'm just stuck. I just feel like wanting someone else to do it for me. Don't get me wrong - I love to digi-scrap - but when my mojo takes a vacation without me, I'm not a happy camper! And I'm sure that there are time you feel the same way, too!
So, here's a little treat from me to you, for those mojo-less days when you want to be productive, but you're just stuck - a QP made from Mary's very fun kit "All American Super Hero." And I've left plenty of space for your own title work and journaling so you can make it all your own.
Here is the layout that I made with it:
Grab the .png file here.
And for all of you SBC+ users, I made this into a .page file, just for you! You can grab it here.
Have fun playing around with it. Enjoy - and have a very pleasant day!
Jan
Monday, May 24, 2010
QP Freebie
Thursday, May 20, 2010
Throwback Thursday
Winner of the $10 Coupon Code - Tip Junkie Tutorial
Abby, please email me so I can send you the coupon code. You can email me at marycwilde at gmail dot com. I look forward to hearing from you!!
Wednesday, May 19, 2010
So my Inspiration for today is, how have your family relationships helped to shape the person you are today? Or maybe you have, like I did, enjoyed watching our children begin a relationship with someone that you hope will last through the years. I would love to see what you come up with! Link your LOs in the comments...we love being inspired by you too!
Monday, May 17, 2010
A Bit of Inspiration
Hi blog readers, Melissa here, aka PrettyPeaches.. My little bit of inspiration is template fun! Lately I have been very inspired by templates! I seriously have a TON of them and I am always looking for more! LOL.. So I hope my template gives you some inspiration to create!
To download this template click HERE!! Love to see what you create, so please post a link of your layout in the comments! Thanks for stopping by and have a fabulously creative week!
Thursday, May 13, 2010
Flashback Thursday!
Mary has them available in this wonderful Super Deal Package at ScrapMatters: http://scrapmatters.com/shop/product.php?productid=2319&cat=0&page=1
Here is a layout I made recently using both kits together:
This kit is perfect for theme parks, capturing your child's evil side or good side, Halloween dress ups, or everyday moments! Enjoy your Thursday!Tuesday, May 11, 2010
Tip Junkie Project of the Week: The Writing's on the Picture!
When I first found out I was going to be posting a project for my Expert Week on Tip Junkie, I knew I wanted to include everyone - digi-scrappers and non-digi-scrappers alike! I wanted to be able to feature a project that most people could do and have a pretty awesome result at the end. So, here's what I've come up with...
My challenge to you is to choose a photo of yours and include some text ON the photo! Easy peasy, right? There are several ways to do this. The "old fashioned" way would be to print your photo and take a pen and write on it. Or you may have used a rub on in those "old days!" But today I'm going to show you a few different things that you can do to write on your photos on your computer. Be sure to check out how to win a $10 coupon code to my store at the end of the tutorial!
Here's the photo I am going to be working with today...
Word Processing Program
The first thing I could do is open my photo in my word processing program. You may be surprised at the amount of options available to you in your word processing software. I know I was! They have shapes, borders, photo enhancements, word art and more! For the purpose of this tutorial, however, I am going to stick with some basic word processing.
With my photo on the page, I would then create a text box and begin creating my very own word art. Be sure that you position the photo behind the text using a text wrapping option. Depending on how you want your word art or text to look, you may need to create several text boxes. In my example, I created 5 text boxes! One for the word "beach," one for the brackets, and one for each line of text. If this seems too complicated, start with something simpler!
Using Microsoft Word...
In Microsoft Word, I don't really have an option to save my document as a .jpeg file. I would probably have to print this at home. Maybe some of you have other ideas. Please share if you do!
Photo Editing Software
You can also achieve this same technique in your photo editing software. There are so many options of photo editing software out there. One may have even come with your digital camera. Some popular options in the digital scrapbooking world are Photoshop, Photoshop Elements (this is what I use), PaintShopPro, Storybook Creator + and so many more!
Using Photoshop Elements 8.0
Open your photo. Use the text box tool to create your text on a layer above the photo. Experiment with layers, opacity, colors and more! In this screen shot you can see how the photo is on the bottom layer of the file. The text files are all on top of that. I used white text and changed the opacity to 30% for the brackets and the word beach. Then the haiku was changed to 60% opacity so that it would be a little more visible than the [BEACH].
My finished product using PSE 8.0
Online Photo Sharing Sites
Another option would be to use an online photo sharing site. Some of these sites may allow you to add text to your photos. I use PhotoBucket to store some of my photos, and they have a semi-creative text option! Picasa and other programs may as well. With these programs, however, your text options may be more limited than in your regular photo editing software.
Using PhotoBucket
Upload your photo. Go to Edit > Add Text. The built in text tool does have a few creative options. Add as many text boxes as you'd like! Experiment with the available tools!
Finished product using PhotoBucket
Conclusion
I don't often use this technique, but I really think it can be a lot of FUN! Think about adding names, dates, one word, monograms...the possibilities are really endless. Then when you have the text figured out, the real fun begins...you can experiment with fonts, colors, layering, anything! And for the advanced user...try your hand at the tablet! You can include your own handwriting right on the photo! WOW! Hopefully this little tutorial inspired you to create something wonderful! I can't wait to see the results.
Here's your chance!!!! I have a chance for you to win a $10 coupon code to my shop at ScrapMatters. To participate, all you have to do is complete the challenge, upload your photo to the web, and then link us up in the comments. A random winner will be selected on May 17, 2010. Photos can be uploaded to a photo sharing site or digital scrapbooking gallery. Photos may also be included on a digital scrapbooking layout; however, they do not have to be! Stand alone photos are perfect too!
Please share any tips or questions you may have so we can all learn and grow together! I look forward to seeing how you will inspire me (because I just know you will!)!
Monday, May 10, 2010
GIve Away Monday!
Here's the cluster I made to go with this great kit! Your Give Away cluster can be picked up here! Enjoy!
Tip Junkie Expert Week!!
Thursday, May 6, 2010
It's time for a sneak peek!
Wednesday, May 5, 2010
Wenesday's Bit of Inspiration
Hi there everyone! Melanie here with this week's bit of inspiration. Whenever I can't decide where to start with a layout, there's a few things I like to do. Sometimes I'll go through my favorites folder to look for a layout to lift, but more often than not I grab a template. I have a rediculous amount of templates on my EHD! But I can't help myself - I love them. When I do start my own layout from scratch I always make it a template first, or turn it into one after I'm finished. That's exactly what I did with this layout I made with Mary's kit Yesterday, Today, Tomorrow.
So to get you inspired this week, I'm sharing my template from that layout! And if you're like me, you love adding one more template to your stash every chance you get! Just click the preview of the template to head over and download it. Thanks for stopping by and have a fabulously creative week!
-Melanie
Monday, May 3, 2010
Saturday, May 1, 2010
ScrapMatters' iNSD Blog Train!!
SM has a beautiful mega-collab out today that celebrates the "moments that matter" in our lives. You might have picked up on the fact that this is our theme for the blog train! Maybe you're laughing, maybe crying...hopefully having a fantastic time reading everyone's stories and picking up their freebies.
I have decided to share a very recent "moment that matters" with you today.
We are expecting baby #2 on May 27th (26 days away, but who's counting!) and we are very excited! I haven't had the most difficult pregnancy, but I've felt under the weather for quite a bit of it and have had some trouble keeping my iron levels high enough.
With Clark, DS #1, we didn't find out what we were having. I pictured the moment when I would deliver my little one and the doctor would say, "It's a ...!" I thought that was going to be the best moment ever. I had planned on having a water birth with a midwife present and was very prepared for the task before me. After 30 hours of labor, they told me that I could go home or they would induce me to help the labor progress. I decided that induction was better than going home empty handed. After some monitoring, drugs, etc., it was decided that I would need a c-section because Clark wasn't recovering from the stress of the contractions. When they laid me down on the operating table, I felt like I couldn't breathe. The anesthesiologist assured me and Jason that I could breathe just fine. They decided to put me in twilight while they did the section so I wouldn't panic.
When I came to, I had missed everything. Jason and Clark were gone, and I didn't know if it was a boy or a girl. I had to ask the doctor.
For this second pregnancy, I wanted to try again. I knew that I was going to have a scheduled c-section, so I wanted the gender to be a surprise. I'm pretty patient...I can last 9 months without knowing if it is a boy or a girl. But on April 10, I woke up and needed to know. I scheduled an appointment with a 3D ultrasound place and we went to find out that baby 2 would be another boy. I immediately felt so much better knowing. It has been such a turning point for bonding with little Kent. For some reason this time it mattered that I knew beforehand what we were having.
Here's a little preview of our little Kent. He wouldn't take his hands down from his face, so we don't have any good shots of him. You can kind of see his profile in the upper left hand corner. A forehead, a little nose, a cheek. Of course there will be cheeks...Jason's family is notorious for them! We did, however, get a great shot of his manhood, but I thought that would be a little less than appropriate for the blog, lol!
And now for your freebie element cluster...be sure to grab it now. Links will be disabled on Thursday, May 6th.
Download here
Enjoy and Happy iNSD!!!
Next stop: Krista's blog aka Sahlin Studio